(Xcode 11, Swift 5.1, iOS 13での実装)
iOSでの、動画を再生する機能の作成について記します。
AVPlayer – AVFoundation | Apple Developer Documentation
AVPlayerクラスを用いることで、映像やオーディオの再生ができます。
しかし、AVPlayerには画面に表示する機能はありません。
画面表示には、2つの方法があります。
* AVPlayerViewControllerを使う。
* AVPlayerLayerを使う。
AVPlayerViewControllerは、動画プレイヤー機能を簡単に作成できるクラスです。
iOS 8で追加され、iOSのアップデートごとに機能が拡充しています。
再生用のコントロールや、AirPlayサポート、Picture in Picture機能などが提供されます。
この記事では、画面表示にAVPlayerViewControllerを用いて、プロジェクトのリソースに加えた動画ファイルを再生する方法を記します。
(AVPlayerLayerを使った例はこちら)
AVPlayerViewController – AVKit | Apple Developer Documentation
動画を再生するサンプル
動画再生機能作成については、Appleのドキュメントが参考になります。
Creating a Basic Video Player (iOS and tvOS) | Apple Developer Documentation
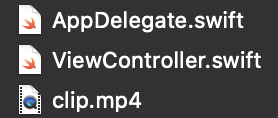
動画ファイルをプロジェクトに加える
File > Add Files to <プロジェクト名>。
動画ファイルを選び、プロジェクトに加えます。
今回は、clip.mp4という名前の動画ファイルが加えられたとして話を進めます。

UI作成
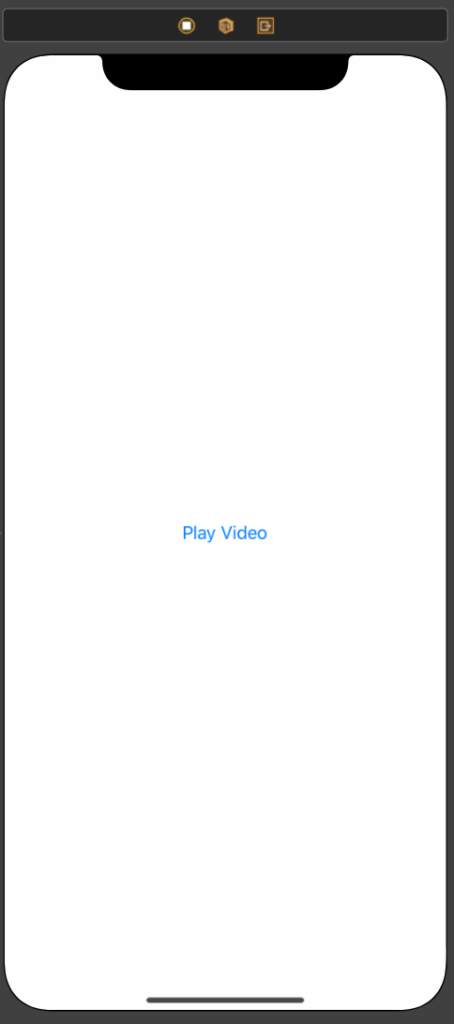
Main.storyboard > View Controllerにボタンを貼り付けます。
テキストを「Play Video」とします。

ボタンとViewControllerをActionで結び、NameをplayBtnTappedとします。@IBAction func playBtnTapped(_ sender: Any) {}が生成されます。
Audio Sessionの準備
AVAudioSession – AVFoundation | Apple Developer Documentation
Audio Sessionとはアプリがどのようにオーディオを扱うかを示すオブジェクトです。再生のみなのか、録音再生を行うのか、バックグラウンド再生ありにするのかなどを設定します。用意されたカテゴリ・モード・オプションから適切なものを選んで設定する形式になっています。
今回は、カテゴリをAVAudioSessionCategoryPlayback(オーディオ機能をメインとしたアプリ用カテゴリ。バックグラウンド再生可能)、モードをAVAudioSessionModeMoviePlayback(ムービー再生用)に設定します。
/// Audio sessionを動画再生向けのものに設定し、activeにします
let audioSession = AVAudioSession.sharedInstance()
do {
    try audioSession.setCategory(.playback, mode: .moviePlayback)

} catch {
    print("Setting category to AVAudioSessionCategoryPlayback failed.")
}

do {
    try audioSession.setActive(true)
    print("Audio session set active !!")
} catch {

}
バックグラウンド再生の準備
今回のサンプルでは、バックグラウンドでのオーディオ再生を行うので、その設定を行います。
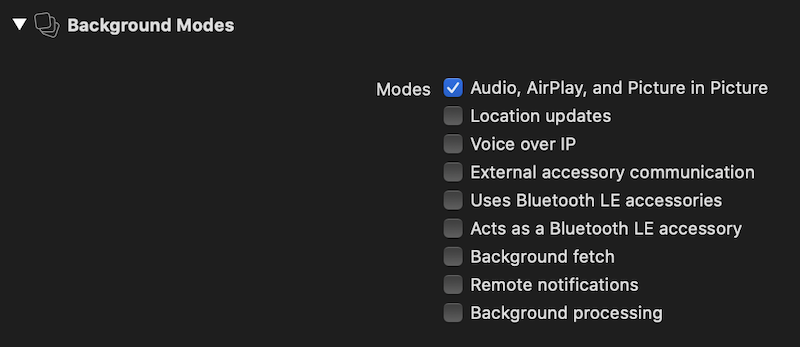
TARGET > Signing & Capabilitiesを選択。
「+ Capability」ボタンから-> Background Modes

Audio, AirPlay and Picture in Pictureをチェック。

これにより、info.plistにRequired background modesが加わり、そのitemがApp plays audio or streams audio/video using AirPlayとなります。バックグラウンド再生が可能になります。
動画プレイヤー
AVPlayerにurlで指定された動画ファイルを渡します。
AVPlayerを動画の表示機能・再生コントロールを担当するAVPlayerViewControllerと結びつけます。
動画プレイヤーを再生します。
guard let url = Bundle.main.url(forResource: fileName, withExtension: fileExtension) else {
    print("Url is nil")
    return
}

// AVPlayerにアイテムをセット
let item = AVPlayerItem(url: url)
player.replaceCurrentItem(with: item)

// 動画プレイヤーにplayerをセット
playerController.player = player

// 動画プレイヤーを表示して再生
self.present(playerController, animated: true) {
    self.player.play()
}
以上で、「Play Video」ボタンを押すと、動画プレイヤーが起動し、動画が再生されます。再生コントロールが表示され、ポーズしたり再開したりできます。
画面下端からスワイプ(もしくはホームボタンを押す)ことで、バックグラウンドに移行すると、再生中の動画は一時停止します。コントロールセンターの再生コントロールから、再生を再開することができます。
使用したソースコード
ViewController.swift
import UIKit
import AVFoundation
import MediaPlayer
import AVKit

class ViewController: UIViewController {

    var playerController = AVPlayerViewController()
    var player = AVPlayer()

    override func viewDidLoad() {
        super.viewDidLoad()
        // Do any additional setup after loading the view.

        /// Audio sessionを動画再生向けのものに設定し、activeにします
        let audioSession = AVAudioSession.sharedInstance()
        do {
            try audioSession.setCategory(.playback, mode: .moviePlayback)

        } catch {
            print("Setting category to AVAudioSessionCategoryPlayback failed.")
        }

        do {
            try audioSession.setActive(true)
            print("Audio session set active !!")
        } catch {

        }

    }

    /// 動画プレイヤーにアイテムをセットして更新
    private func playMovie(fileName: String, fileExtension: String) {
        guard let url = Bundle.main.url(forResource: fileName, withExtension: fileExtension) else {
            print("Url is nil")
            return
        }

        // AVPlayerにアイテムをセット
        let item = AVPlayerItem(url: url)
        player.replaceCurrentItem(with: item)

        // 動画プレイヤーにplayerをセット
        playerController.player = player

        // 動画プレイヤーを表示して再生
        self.present(playerController, animated: true) {
            self.player.play()
        }
    }

    /// Play Videoボタンが押されました
    @IBAction func playBtnTapped(_ sender: Any) {
        let fileName = "clip"
        let fileExtension = "mp4"
        playMovie(fileName: fileName, fileExtension: fileExtension)
    }

}